How to Adjust a Worker’s Time Clock
You can easily update or correct a worker’s time clock entries using the Adjustment tab.
Steps to Adjust Time Clock Entries 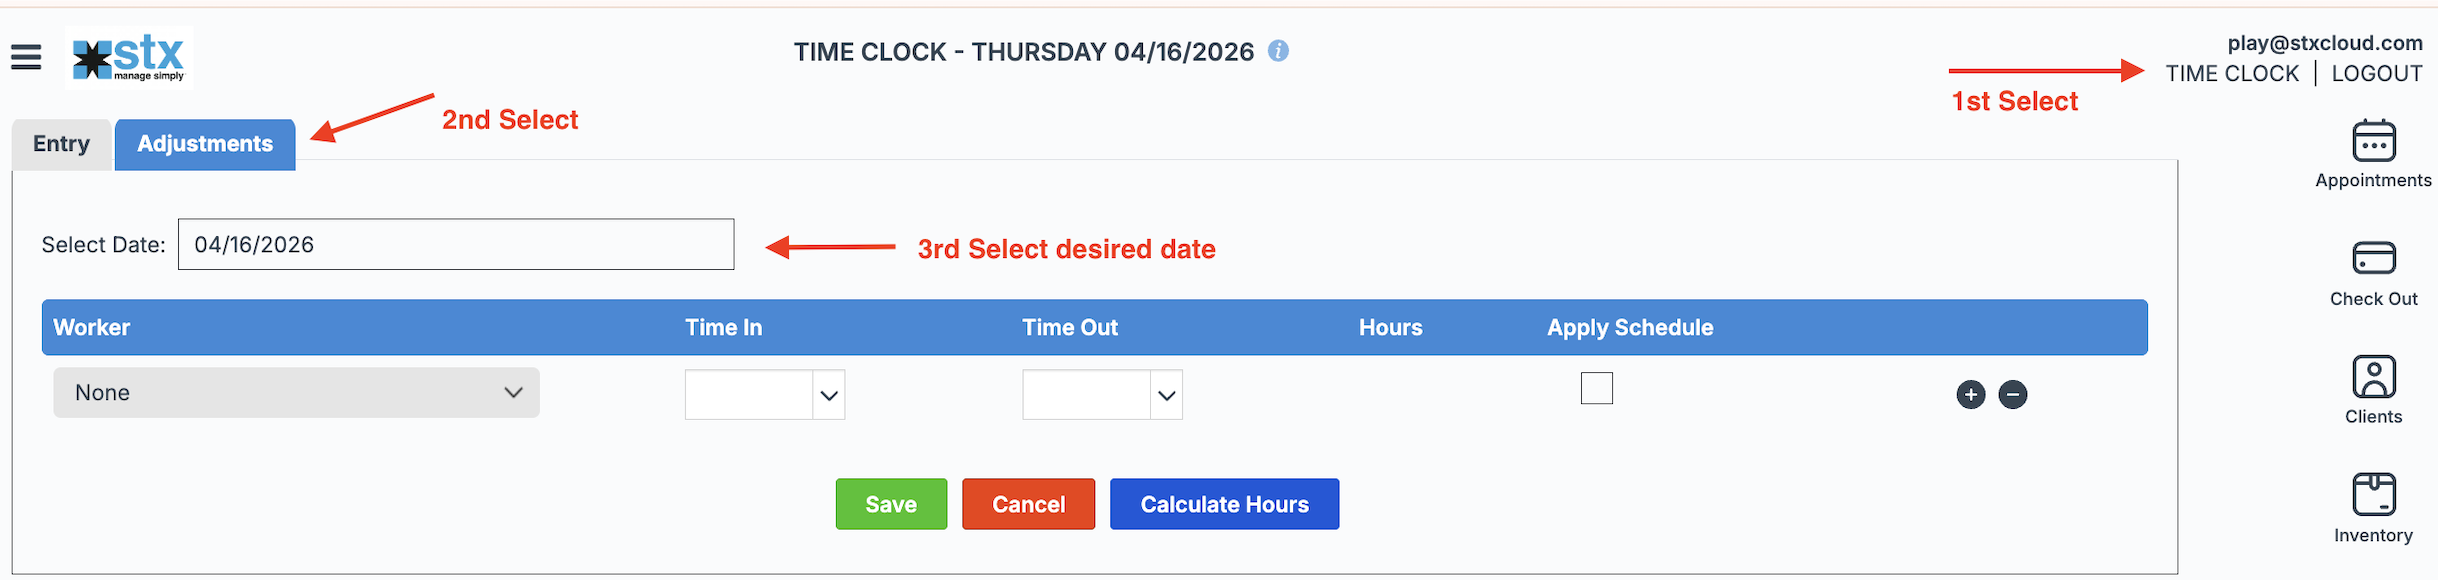
- Go to Time Clock
- Select the Adjustment tab
- Choose the date you want to review or edit
Editing an Existing Entry
- If the worker is already listed:
- Locate their name
- Use the dropdown fields to adjust their Time In and/or Time Out times
Adding a New Time Clock Entry
- If the worker is not listed:
- Click the ➕ (Plus Icon)
- Select the worker’s name from the dropdown
- Enter the Time In and/or Time Out
Removing a Time Clock Entry
- To remove an entry:
- Click the ➖ (Minus Icon) next to the worker on the selected date
Helpful Tools
- Calculate Hours
- Click this to view the total hours worked for each worker listed
- Apply Schedule
- Automatically fills in the worker’s scheduled Time In and Time Out
Final Step
- Be sure to click Save after making any changes
Column Descriptions
- Worker – Displays the worker assigned to the time clock entry for that day
- Time In – Shows the clock-in time (manual entry, applied schedule, or adjustment)
- Time Out – Shows the clock-out time (manual entry, applied schedule, or adjustment)
- Hours – Displays total calculated hours once Calculate Hours is selected
- Apply Schedule – Allows you to apply the worker’s scheduled hours from Setup > Worker Details
- ➕ ➖ - Use the ➕ icon to add additional workers to a time clock entry for the selected day, Use the ➖ icon to remove a worker’s time clock entry
 Note: To adjust any worker scheduled hours visit Setup > Setup Worker Details
 Note: To assign a worker a time clock pin visit Setup > Setup Worker Details