How to assign automatic promotions to a client card
Automatically apply promotions to a client ticket at check out, here's how!
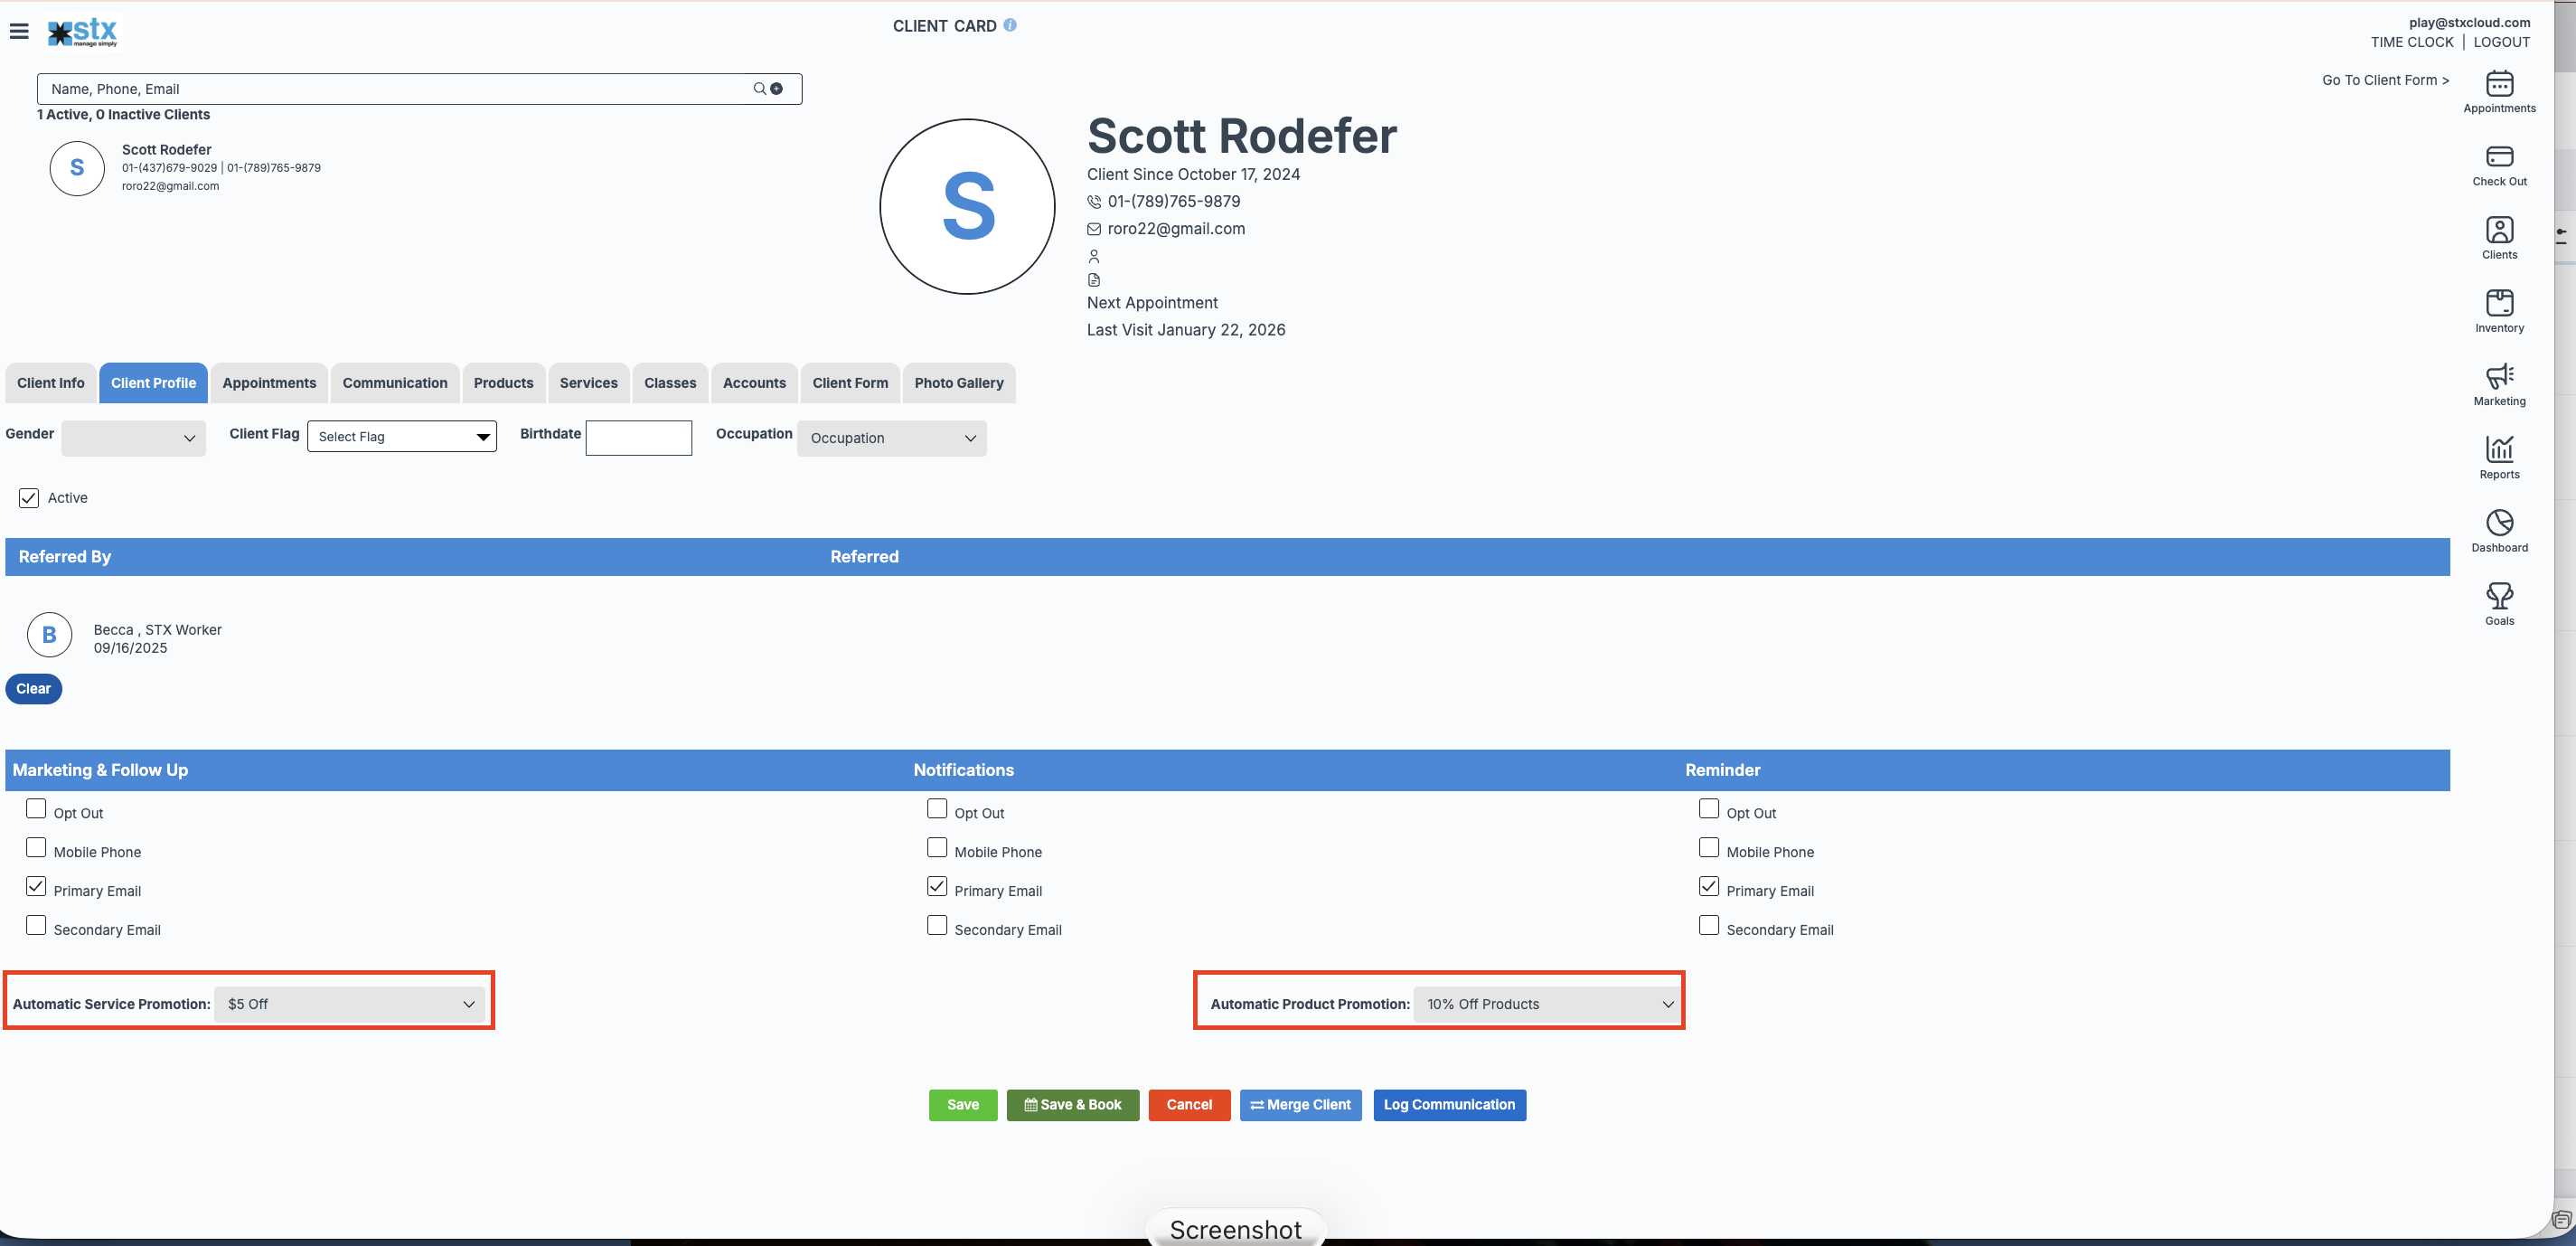
Assigning an automatic promotion to a client card gives you peace of mind knowing the discount will always apply at checkout. These promotions are truly set it and forget it—once assigned, there’s no need to manually add them during checkout.
This is a great way to consistently honor VIP clients, friends & family, or special customer groups.
When a client with an automatic promotion is checked out, the promotion is applied automatically to all services and/or all products on the ticket as soon as you select Checkout. ✔️
 Promotions must already be created in the system before they can be applied automatically to a client.
Promotions must already be created in the system before they can be applied automatically to a client.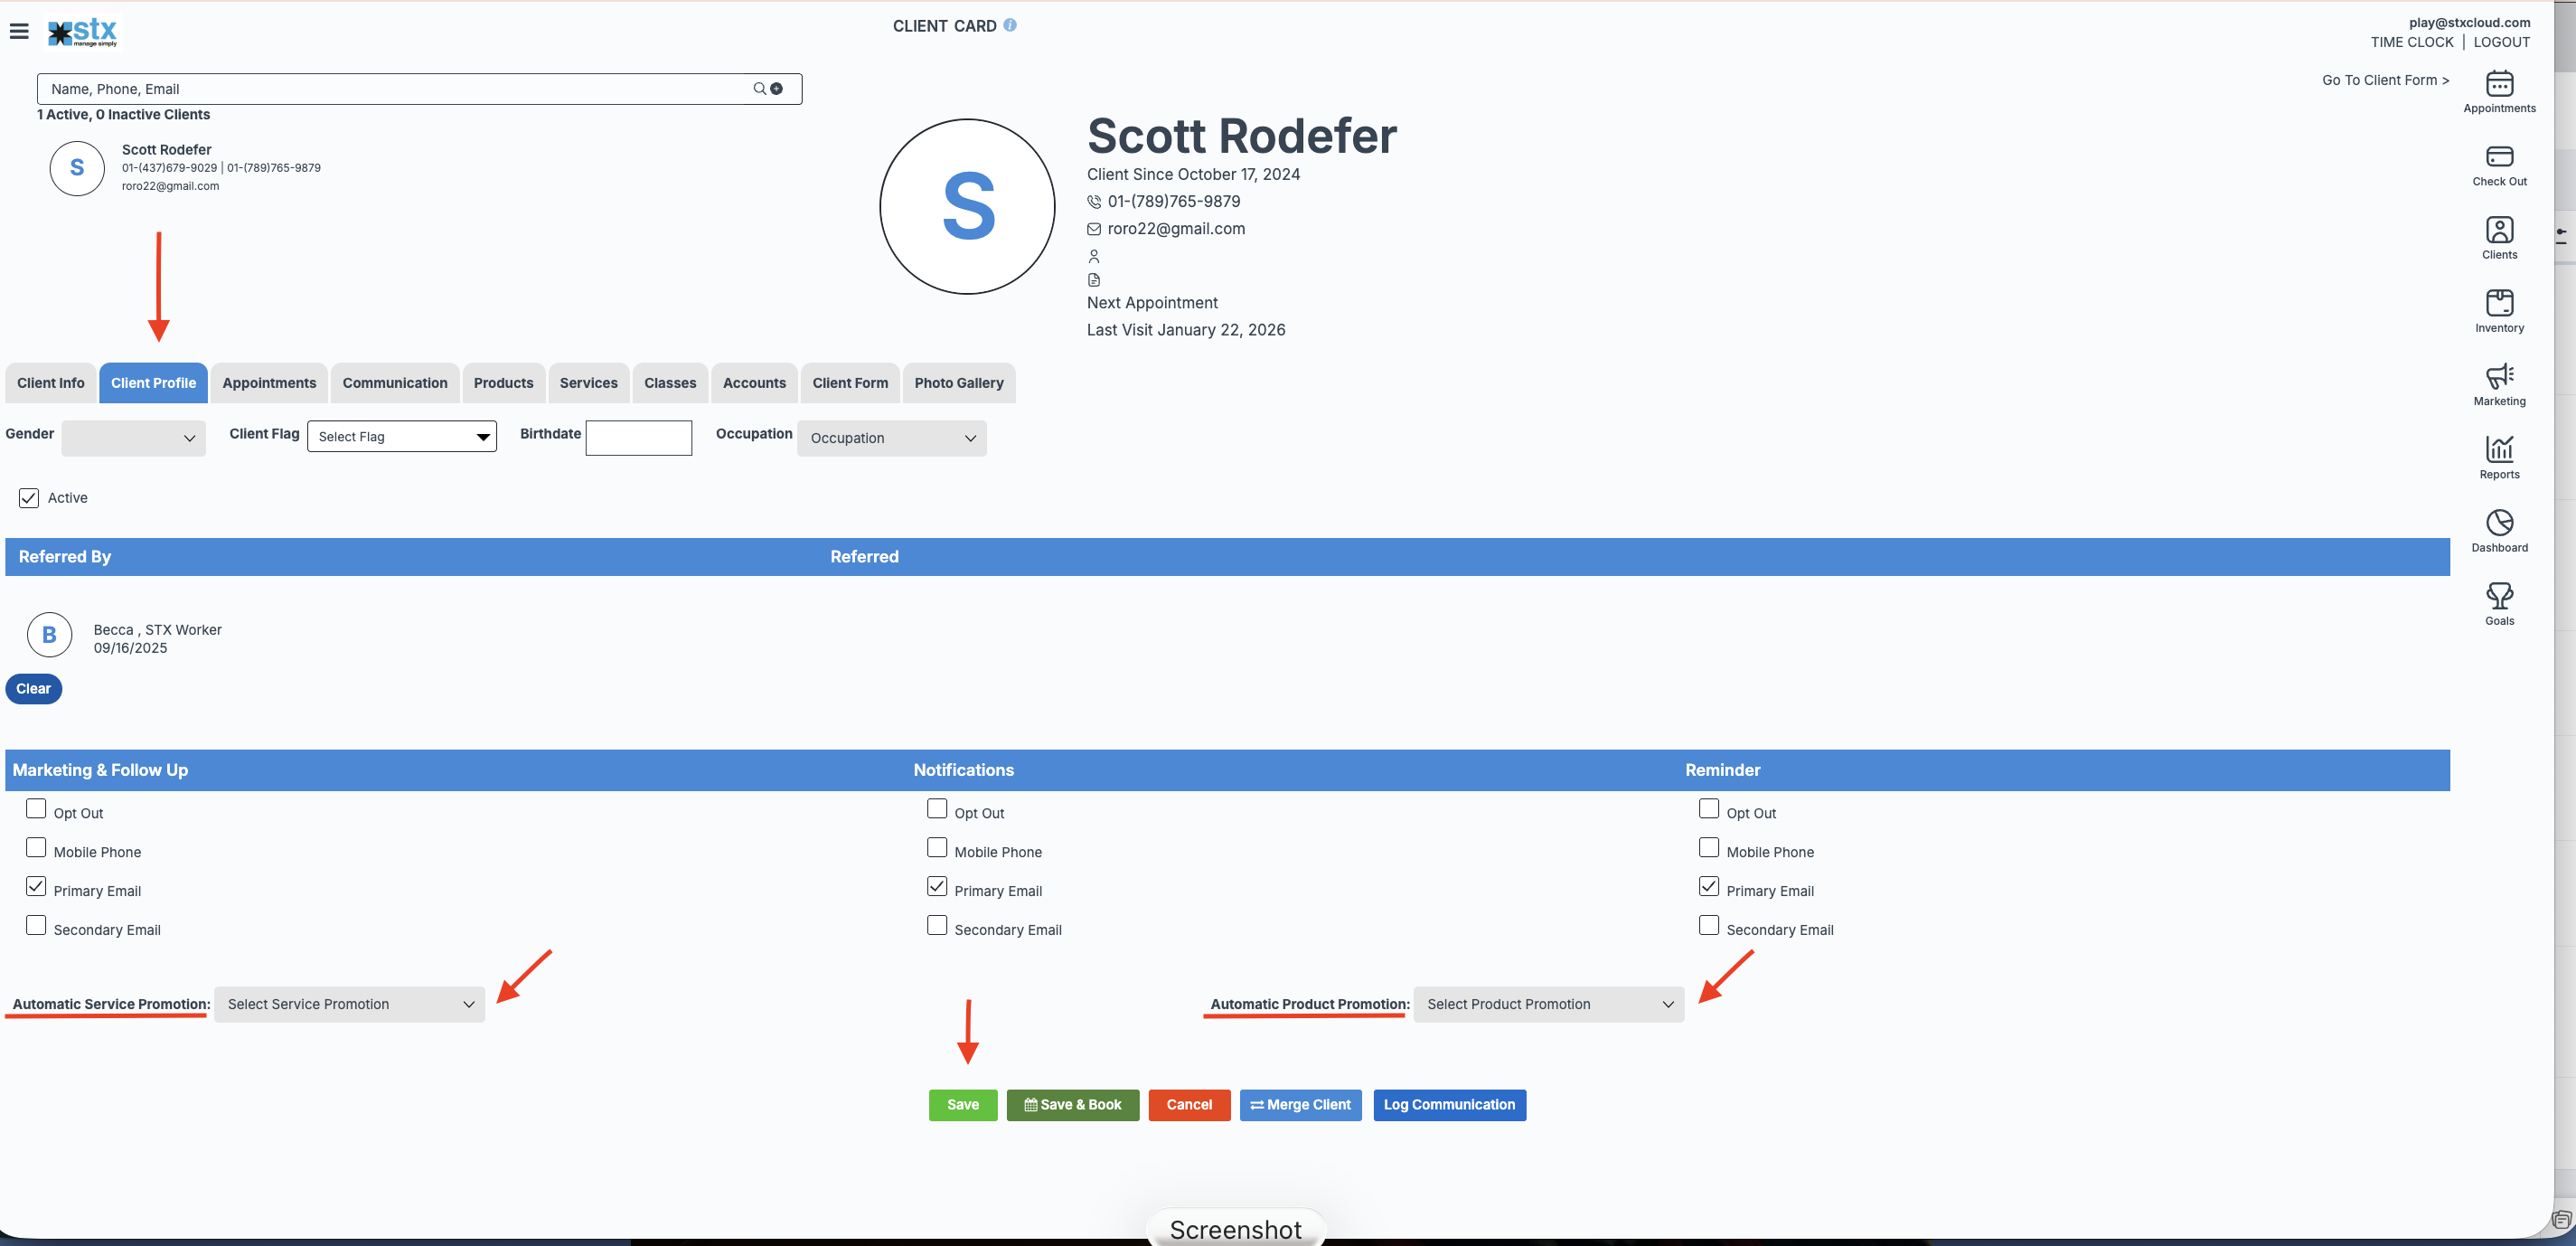 .
. 
Steps to Set Up Automatic Promotions
Step 1: Open the Client Card
Navigate to the Client Card for the client you want to apply automatic promotions to.
Step 2: Go to the Client Profile Tab
Select the Client Profile tab.
Step 3: Choose Automatic Promotions
At the bottom of the Client Profile:
Use the Automatic Service Promotion dropdown to apply a promotion to all services added to a ticket.
Use the Automatic Product Promotion dropdown to apply a promotion to all products added to a ticket.

During Checkout 💳
When you reach the Checkout screen, you can remove a promotion from any individual service or product if you don’t want it applied.
Important Notes 📌
Automatic promotions apply to all services or all products — you cannot assign them to a specific service or product group.
You can remove promotions from individual items at checkout.
Promotions must exist first before they can be selected on a client card.