Setup Service Groups
Create & Manage Service Groups
Service Groups help organize your services into categories, making them easier for both your staff and clients to find when booking appointments.
Example:
- Service Group: Hair Color
- Services: All Over Color, Color Retouch, Highlights, Men's All Over Color
You can also assign a unique color to each Service Group, making appointments and point-of-sale items easier to identify throughout Inspire.
Create a Service Group
- Go to Navigation Menu > Setup > Setup Service Groups.
- Click Add New to create a new Service Group, or select an existing Service Group to make changes.
- Enter the Service Group Name.
- Assign a Color to the Service Group.
- Note: The text displayed on the color is always black. For the best visibility, we recommend choosing a light or medium color.
- (Optional) Enter a Sort Order.
- (Optional) Enter an Online Client Facing Name if you'd like clients to see a different name than your internal Service Group name.
- Click Save.
Why Use a Color?
Assigning a color to each Service Group provides a quick visual reference on the Appointment Calendar, making it easier for your staff to identify different categories of appointments at a glance.

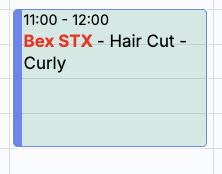 vs
vs 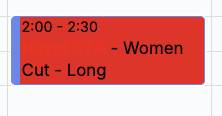
Why Use a Sort Order?
By default, Service Groups are displayed in alphabetical order when booking appointments, both for your staff and for clients using Online Booking.
If you assign a Sort Order, Service Groups with a Sort Order will appear first (from lowest number to highest). Any Service Groups without a Sort Order will then display in alphabetical order.
A Sort Order is helpful when you want to prioritize certain categories, such as displaying Consultations before all other services or keeping Add-On services lower in the booking flow.
Why Use an Online Client Facing Name?
An Online Client Facing Name lets you use internal naming conventions within Inspire while displaying a more descriptive name to clients during Online Booking.
For example, your internal Service Group might be HL, while clients see Highlights when booking online. This allows your team to use familiar shorthand without affecting your clients' booking experience.